 Forefront
Advanced Standards
Advanced standards configuration for the district.
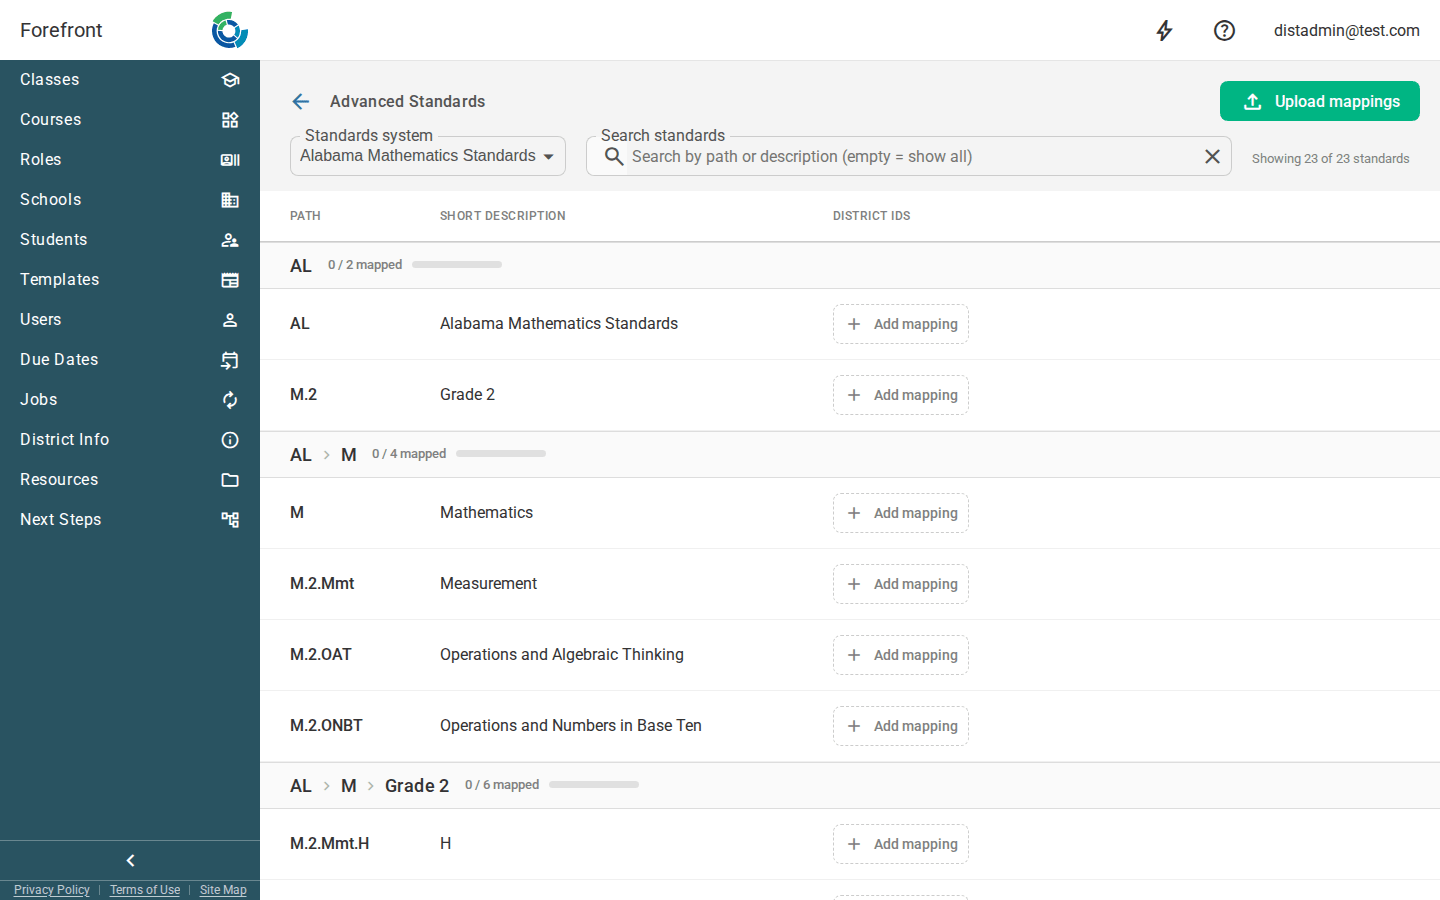
The Advanced Standards page is where a district administrator maps each academic standard to the ID your other systems use for it — so that scores and standards line up when you sync with a SIS or standards service. You assign one or more district-specific IDs to each standard.
Choosing a standards system
The Standards system dropdown at the top left picks which set of standards you’re mapping — your district’s active standard roots (for example, a state or Common Core system). Switching the system reloads the table with that system’s standards. The selection is stored in the page URL, so it’s shareable and survives a refresh.
Finding standards
Use the Search standards box to narrow the list. You can search by standard path or by description; leaving it empty shows every standard in the selected system. As you type, the count under the toolbar updates to read Showing X of Y standards so you can see how much the search has filtered the full set.
Reading the table
Standards are listed in a table with three columns:
- Path — the standard’s code (or its path if it has no code).
- Short description — the standard’s plain-language description.
- District IDs — the ID(s) you’ve mapped for that standard.
Rows are grouped by their parent path. Each group has a heading with a X/Y mapped count showing how many standards in that group already have at least one ID assigned.
Assigning and editing IDs
In the District IDs column, each mapped ID appears as a labeled input you can type into. Available ID types are PowerSchool, edTech CASE, Infinite Campus, and State. To work with IDs on a standard:
- Click the Add ID (+) button and pick a type from the menu to add a new ID slot for that standard. Types you’ve already used are removed from the menu, and the button disables once every type is in use.
- Type into an ID field to set its value. Edits save automatically a moment after you stop typing — there’s no separate save button.
- Click the ✕ next to an ID to remove that type’s mapping. Clearing or removing a value clears it on the server too.
Uploading mappings in bulk
The Upload mappings button in the top bar opens a three-step wizard for assigning IDs to many standards at once from a CSV:
- Choose file — pick a CSV with two columns,
pathand the district’s ID for that standard, and choose which ID type the file is for. You can also use Download template to export a starter CSV pre-filled with the currently listed standards’ paths and any existing IDs for the selected type. - Preview — the wizard parses the file and shows a summary of how many rows are ready, how many have a blank value (which will clear an existing ID), and how many rows have no path (which are skipped). A preview of the first several rows shows each row’s status.
- Apply — a progress bar tracks the upload. When it finishes, the wizard reports how many mappings were applied and lists any rows that failed.
Use Cancel or Back to step out of the wizard, and Done to close it and refresh the table with the new IDs.
When there are no matches
If your search matches no standards, the page shows a “No standards match your search” placeholder. Clear or broaden the search to see standards again.
Permissions
Advanced Standards is a district-management tool. If your district has no active standard roots configured, the system picker and table will be empty — configure the district’s standards first.