 Forefront
Users Management
Managing educator user accounts and their roles.
The User Management page is where district administrators create and manage educator accounts — teachers, school and district staff, and leaders — and control the role and schools each account is assigned to.
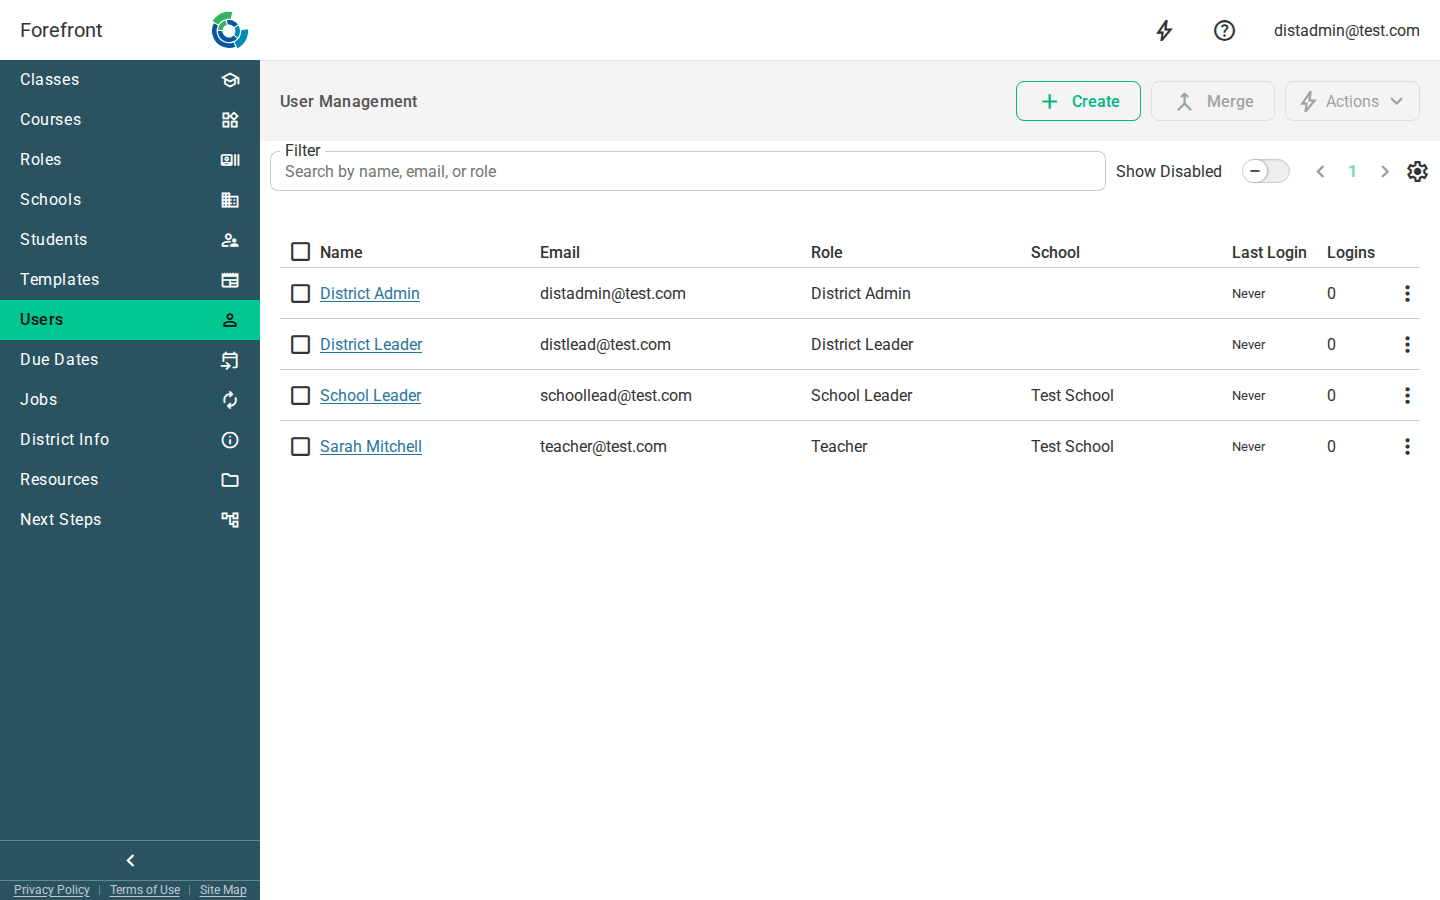
The user table
Each row is one educator account, with these columns:
- Name — click a name to open that user’s detail page, where you can edit their profile, role, schools, and login credentials.
- Email — the account’s email address.
- Role — the role assigned to the user, which determines their permissions.
- School — the school (or schools) the user is attached to.
- Last Login — the date the user last logged in, or Never if they haven’t.
- Logins — the total number of sessions the account has logged.
Disabled users appear dimmed in the list.
Searching
Use the Filter box at the top to find users. It searches by name, email, or role, narrowing the table as you type.
Paging
The pager at the top right moves through the list a page at a time when there are more users than fit on one page.
Creating a user
Click Create to open the new-user form. Fill in the First Name, Last Name, and Email, then pick a Role. The email must be unique — the form checks availability and flags it if the address is already taken.
If the selected role has school-level access, a Schools picker appears so you can assign the user to one or more schools; roles that operate at the district level (district leader or district management) don’t need a school assignment. When you click Create, the account is created with a login credential matching your district’s default login method, and you’re taken straight to the new user’s detail page.
Enabling and disabling users
Rather than permanently deleting accounts, users are enabled or disabled. To change a single user, open the row’s options menu (⋮) and toggle Enabled. Disabling a user revokes their access without removing their history.
By default the table hides disabled accounts. Turn on the Show Disabled toggle to include them in the list.
Bulk actions
Use the checkboxes to select users — tick individual rows, or use the header checkbox to select the whole page. With one or more users selected, open the Actions menu (⚡) to:
- Enable Selected — re-enable every selected account.
- Disable Selected — disable every selected account.
- Clear Selected — clear the current selection.
Merging users
If the same person has ended up with two accounts, select exactly two users and click Merge. A dialog asks which account to keep; the other is merged into it and removed. Merge is only available when precisely two users are selected.
Impersonating a user
Superusers see an Impersonate action in a user’s row menu (⋮). Choosing it logs you in as that user and reloads the app so you can see the product exactly as they do. This action is only visible to superusers.
When the list is empty
If no accounts match your search (or the district has no users yet), the table shows a No Users Found placeholder. Clear the filter or turn on Show Disabled to widen what’s shown.