 Forefront
Importing Assessment Data into Forefront
This article explains how to import assessment data from a file into Forefront. Learn how to build an import recipe, map questions to columns, and confirm the import completed successfully.
Before you begin
- The Import tab must be enabled for your district.
- Reach out to support@forefront.education if it is not.
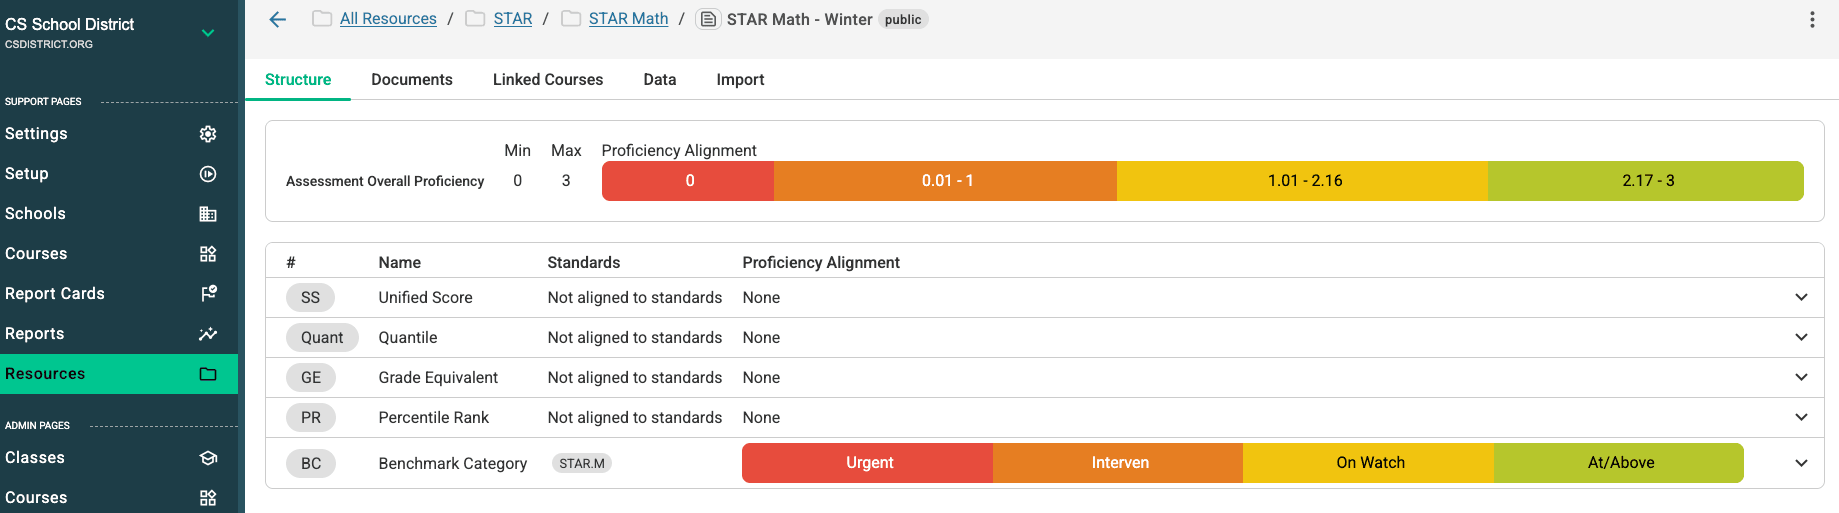
Step 1: Open the assessment in your resource folder
Access the assessment you’d like to import data into from your resource folder.
Tip: If the assessment still needs to be created, the How to Create (or Modify) a Custom Assessment article walks you through that process first.
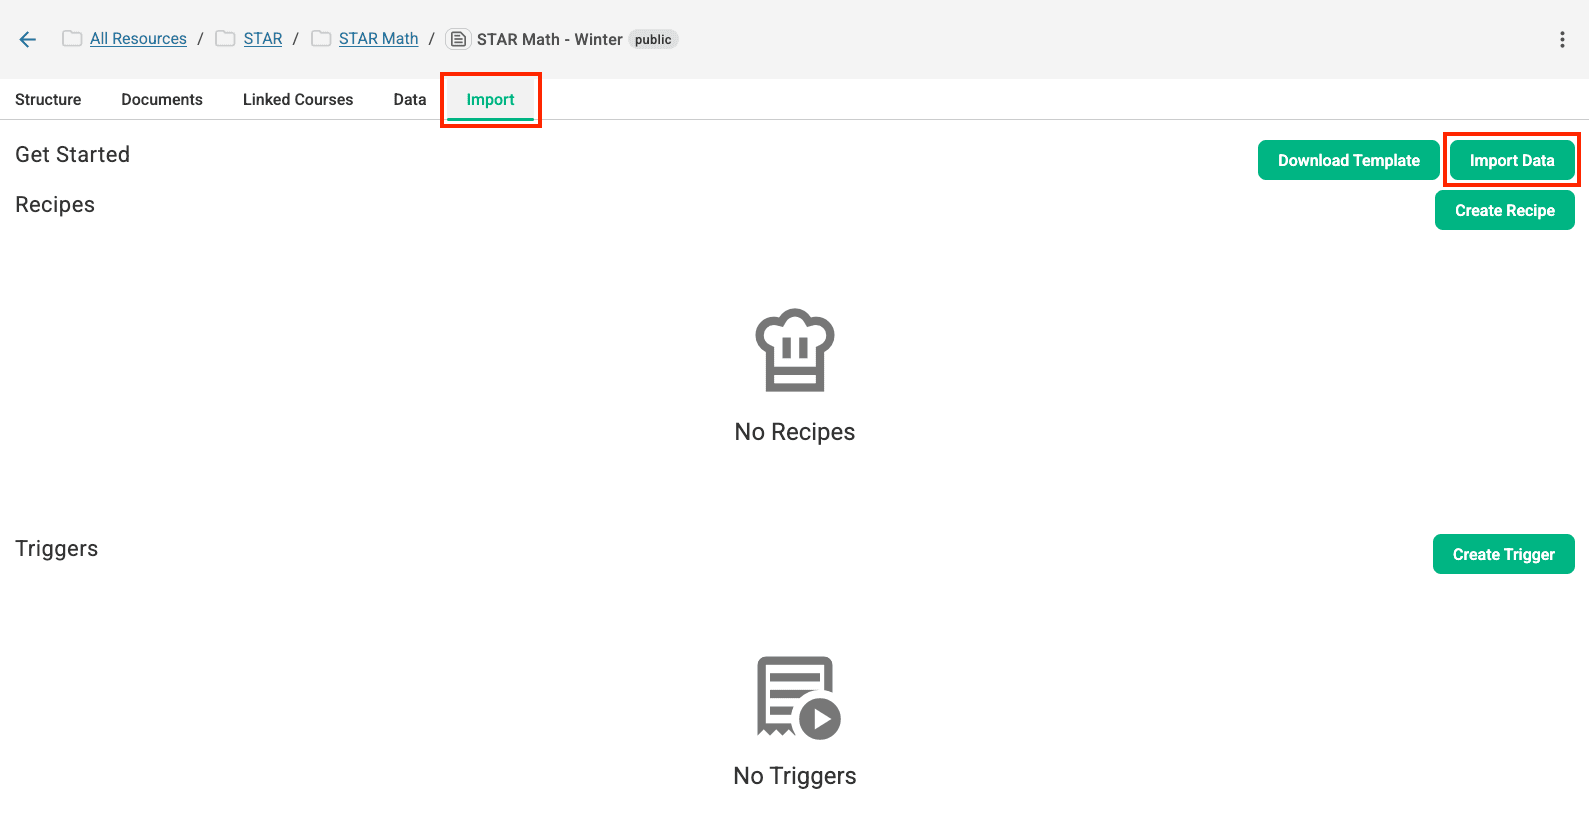
Step 2: Open the Import tab
Go to the Import tab and select Import Data.
Note: Reach out to your account manager if you don’t see this tab. It must be toggled on for your district.
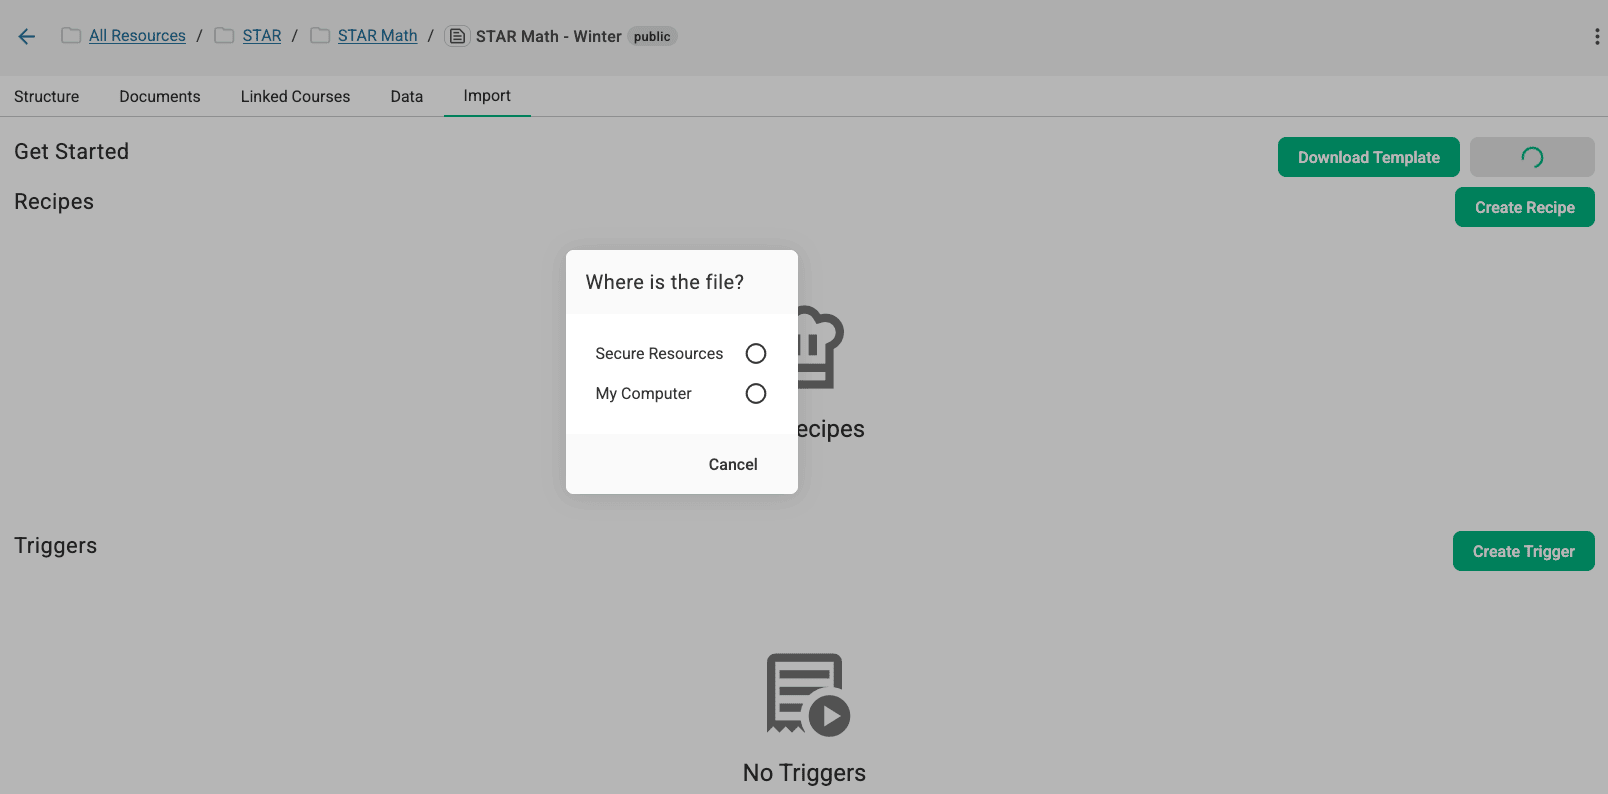
Step 3: Find the file you wish to import
Locate the data file you would like to import.
Find support for adding files to your Secure File folder in Forefront here.
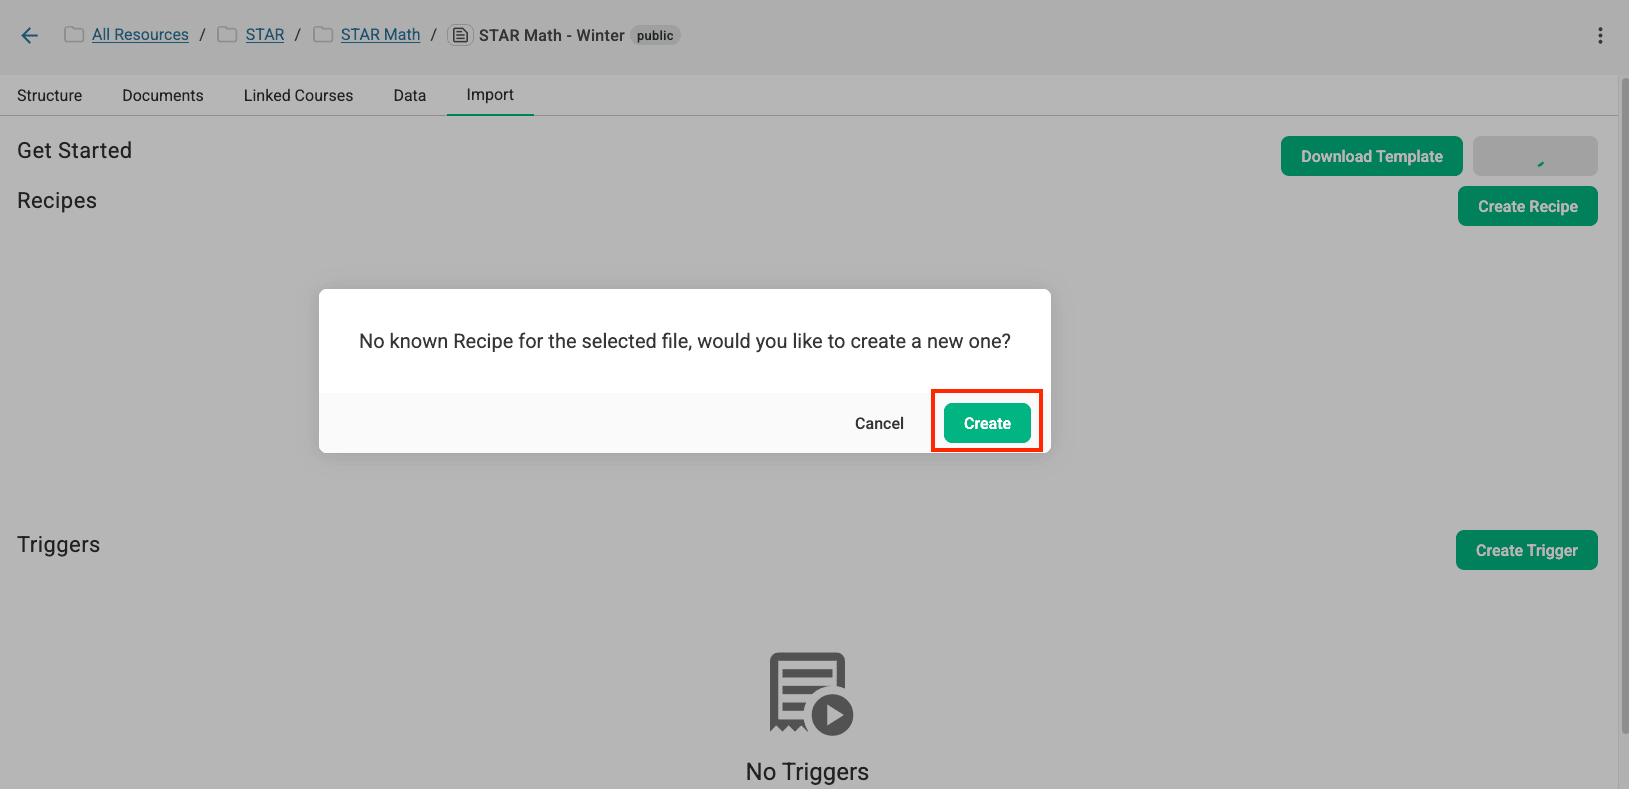
Step 4: Create a new recipe
After selecting the file, click Create to start a new recipe.
Step 5: Name the recipe and configure the Student ID and date
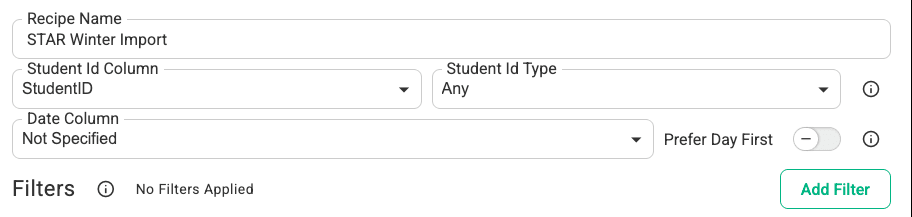
Name your recipe. Configure the Student ID by selecting the corresponding column header and choosing the ID type. For the date, either select the corresponding column or choose Not Specified to enter a date manually.
Note on Filters: Filters let you filter out rows of data. This is generally used when there are multiple assessments in one file.
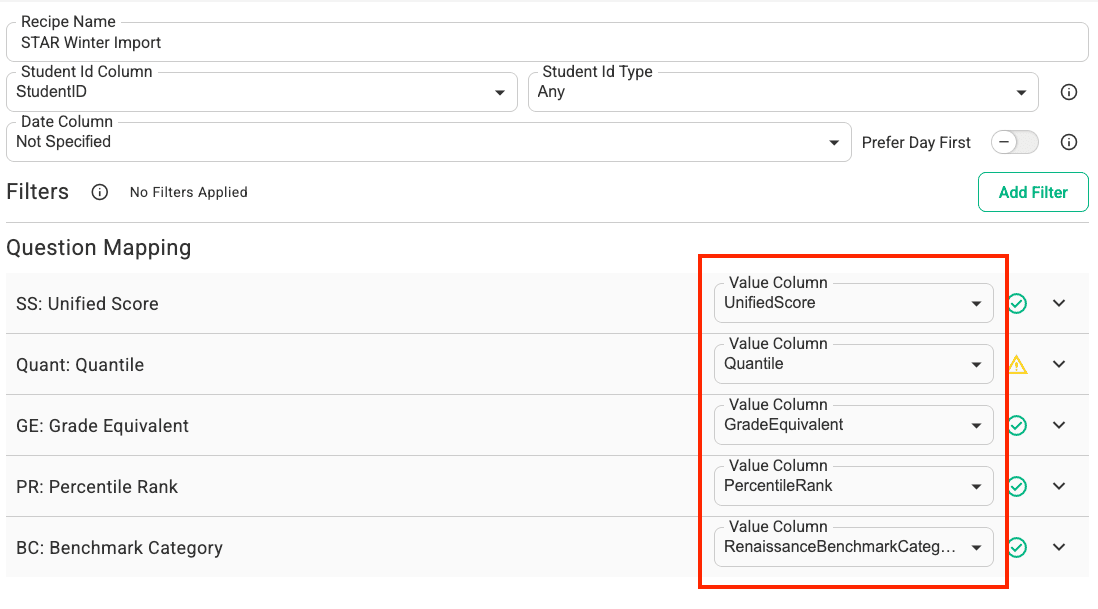
Step 6: Map the questions to columns
Map the assessment questions to the corresponding columns in your file.
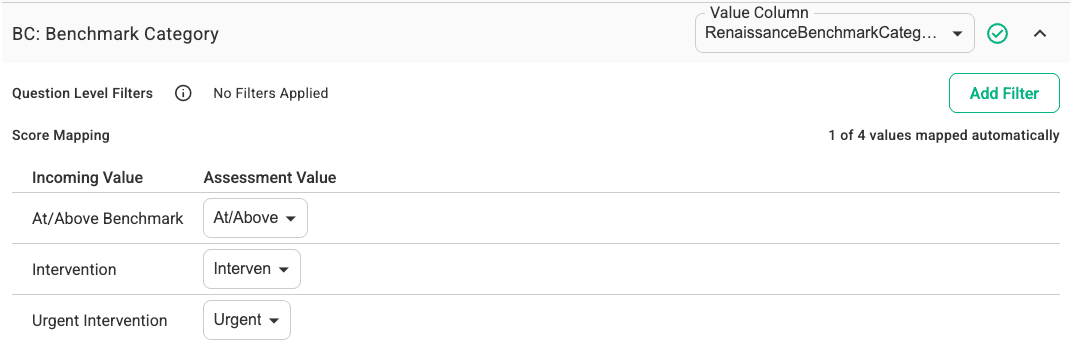
Step 7: Confirm values are aligned
Click the dropdown to confirm that values are correctly aligned.
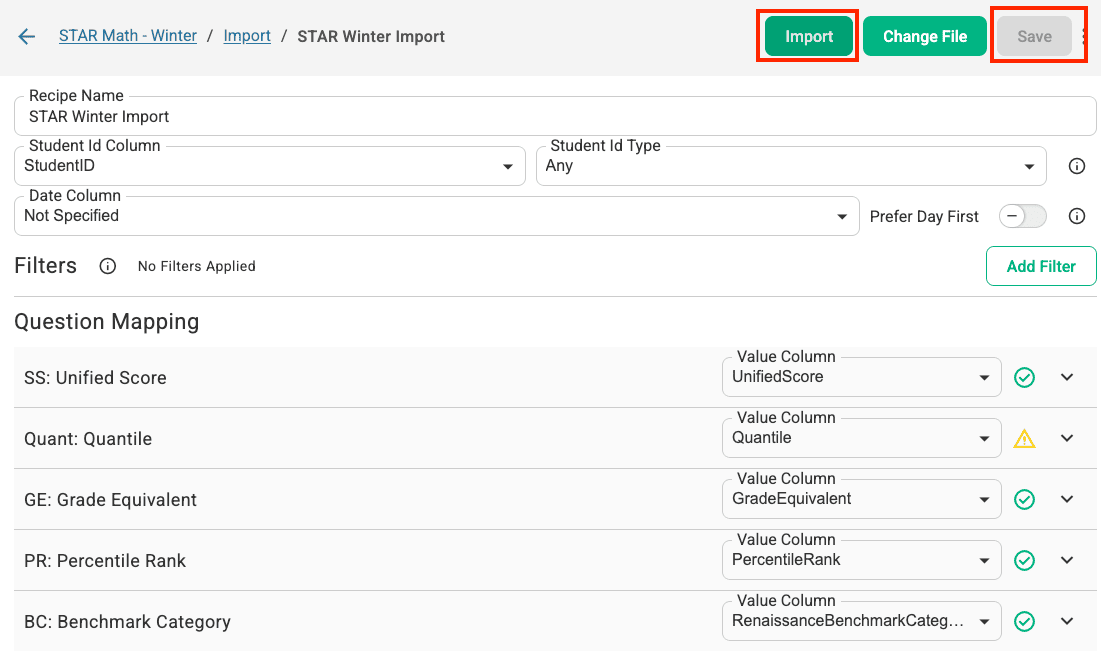
Step 8: Save and import
Save and import using the buttons in the top-right corner.
Note: If you marked the date column as Not Specified, you’ll be asked to select an assessment date.
Step 9: Confirm the data imported correctly
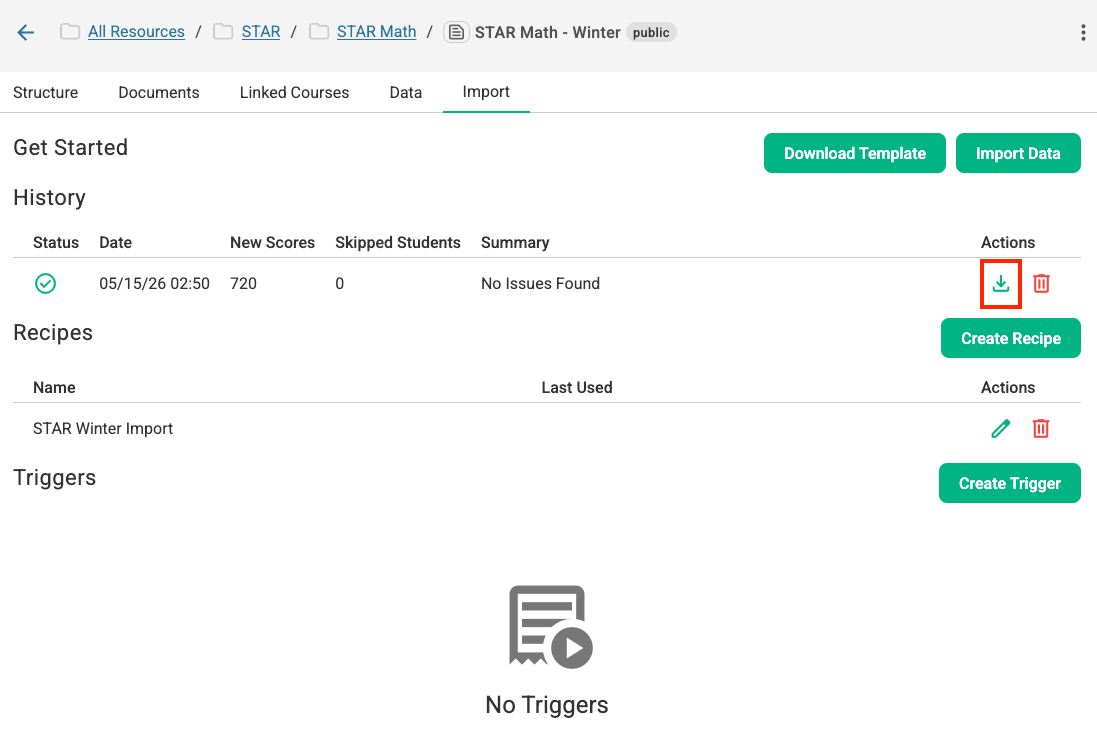
Review the imported data to confirm everything came through as expected.
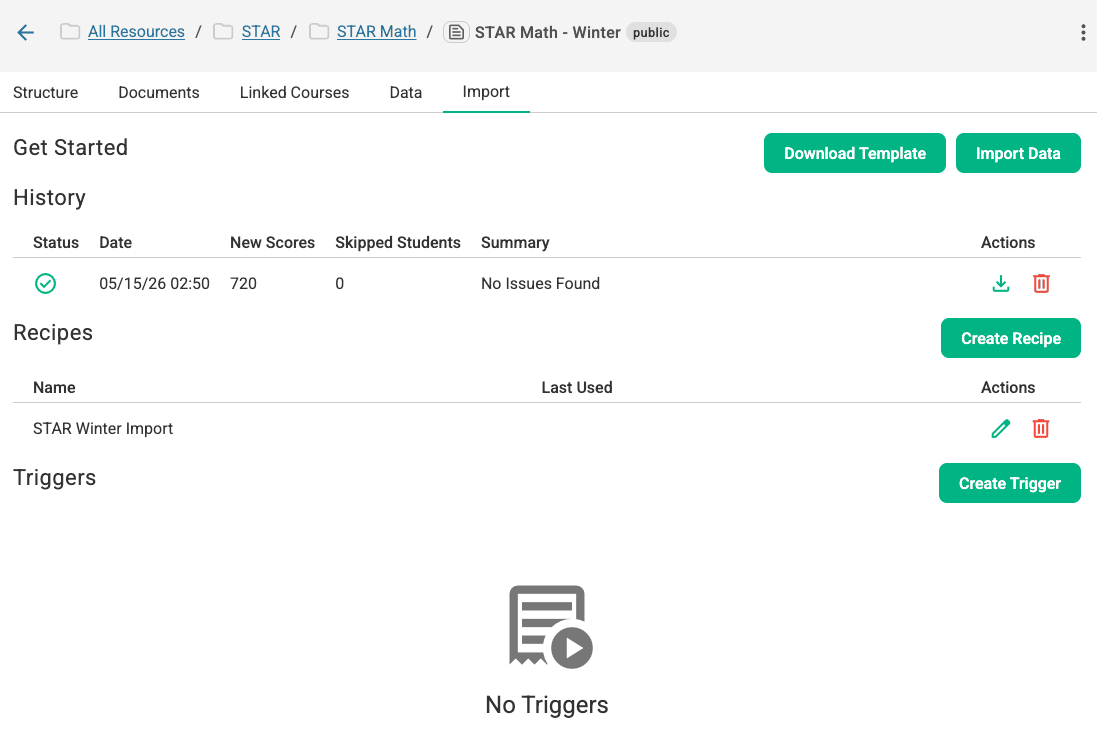
Note: Use the download button to find any import issues in the far-right column.
If an import went wrong
If an import brought in the wrong data, for example from the wrong date column or the wrong file, you can remove it from the assessment’s Data tab and import again.
Open the Data tab and choose the school year the data was imported into.
Check the box next to each data set you want to remove. To pick every data set in the list, check the box in the header row.
Click the menu above the table that shows how many you’ve selected (for example, 3 Selected). Choose Delete Selected, then confirm.
Deleted data sets no longer count toward any reports. If you deleted something by mistake, click Undo in the message that appears at the bottom of the screen.
Once you’ve fixed the recipe, run the import again.
Need more support?
Submit a support request or email our team at support@forefront.education.